Photo by Anna Tarazevich
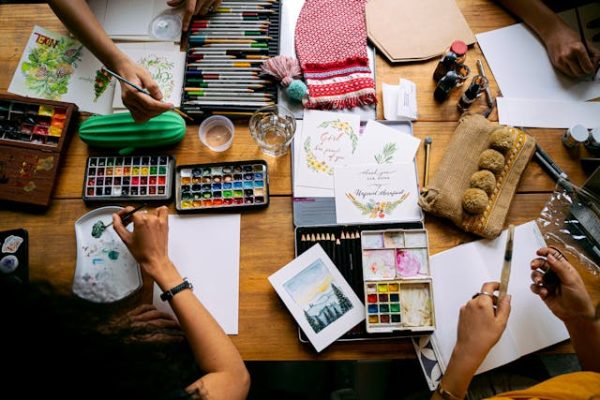
The holiday season can leave families looking for enjoyable and easy activities, such as carving pumpkins during Halloween. There are lots of pumpkin carving ideas for craft festivals. However, there are other arts and crafts that you can try with your family and friends.
Below, we will discuss other arts and crafts activities you can partake in.
Tea Light Snowman Ornaments
Using tealights, you can create snowmen who will light up your house with their glowing noses.
Materials
- Black construction paper
- Thin red ribbon
- Thick red ribbon
- Glue stick and glue dots
- Black permanent marker
- Ten tealights
- Pipe cleaners
- Small multicolored poms-poms
Instructions
- Use black construction paper to cut out five snowman hats, and glue the thin red ribbon to the rim of the hat and the top.
- To help create the face of the snowman, draw eyes using the permanent marker and a dotted smile around the tealight’s light.
- Glue the hats onto the heads of the snowmen by using glue dots.
- Still, using glue dots, take the multicoloured poms-poms to the sides of the heads to
- Take the pipe cleaner and glue the pieces between the poms-poms to create an earmuff line on each snowman’s head.
- The thick ribbon can create scarves and bow ties to the snowmen’s heads at the bottom.
- You can use the thin ribbon on the back of each tealight candle at the top of the snowmen’s heads.
- Once complete, you can hand the tealights and turn them on, giving your snowmen a glowing nose.
Paper Plate Llamas
If you have leftover paper plates after hosting your family, then creating Llamas can help prevent them from going to waste.
Materials
- Paintbrushes
- Pencil
- Hot glue gun
- Scissors
- White Paper plates
- Delta Ceramcoat Acrylic Paint
Instructions
- You need to cut the paper plate in half. One half will be the head, tail, and legs, and the other half will be the body. Using the pencil, draw the neck and head on the cut edge of the one half.
- Cut the neck and head, and use the remaining scraps to cut out the tail and the legs. Ensure the legs are rectangles with rounded ends and the tail is a tiny raindrop.
- Assemble the Ilama by using the glue gun to attach the parts. Ensure that each piece is glued to the back part of the body.
- Once the Ilama is attached, you can start decorating it by adding ears, eyes, and other colourful details using Delta Ceramcoat paint, and let it dry when you have finished.
Toilet Paper Bee
This activity can welcome springtime!
Materials
- Black Marker
- Cardstock, white, yellow and black
- Small googly eyes
- Pink Paint
- Toilet paper rolls.
- Halved paper towel rolls.
- Small black pom-poms
- Glue
- Black Pipe cleaners
Instructions
- Measure a rectangle on the yellow cardstock paper and fit it around the paper roll. The edges can overlap slightly once you have wrapped the paper roll and can be glued or taped into place.
- Next, using the black cardstock paper, cut two narrow strips to wrap around the yellow paper roll to make the bee stripes. Ensure you leave space on the top of the paper roll to make space for the bee’s face.
- Glue on two googly eyes in the space left for the bee’s face.
- Using a black marker, draw the bee’s mouth. A simple curved line will be enough for a smile. You can make cheeks by dipping the paintbrush into pink paint. Add two dots of the paint on each side of the mouth.
- Take a pipe cleaner and fold it into the shape of a V. Add two small pom-poms to the ends of the V tops. Then, glue the pipe cleaner to the paper roll above the bee’s face.
- Cut out two wings using the white stock paper and glue them to the back of the paper roll. Now, your bee is complete.
Popsicle Stick Ferris Wheel
Bring the carnival to your home! You can make these easy D-I-Y Ferris Wheel that actually spins.
Materials
- 110 jumbo popsicle sticks
- 75 regular popsicle sticks
- 20 wooden beads
- Four wooden blocks
- Two wooden spools
- Hot glue gun and glue sticks
- Scissors (sharp enough to cut through the wooden dowels and popsicle sticks)
Instructions
- First, glue four jumbo popsicle sticks onto one of the wooden spools in a cross shape. Then, glue four additional jumbo popsicle sticks on the top of the cross you made in the spaces the first cross shape has made. It will now look like a wheel shape.
- To complete the wheel, glue eight of the popsicle sticks (regular) between the ends of each jumbo popsicle stick to close the wheel. Using these steps, create a second Ferris wheel.
- Next, glue two spools together (from the bottom of each Ferris wheel) and ensure they align so that crosses are matched on either side.
- Now, you cut the dowels down to fit into the spaces between the front and back of the Ferris wheels. You need to use eight pieces of dowel and attach a wood bead on each end between gluing them in place.
- To create the base for the Ferris wheel, you need to line up 13 jumbo popsicle sticks horizontally and glue four of these jumbo sticks vertically on top of the horizontal base.
- Next, overlap two popsicle sticks to make an X, glue them together, and do this at least three more times. These will be the braces for the Ferris wheel.
- Using the braces as a frame of reference, you can use these to identify where you will place the wooden blacks to attach your braces. Glue the wooden blocks in place. Then, glue the braces into place on each wood block.
- Next, slide a dowel through the center of the two spools and add two wood beads to each end. One bead will sit in between the Ferris Wheel and the brace, while the other will be placed on the outside of the brace. Remember to trim the dowel to fit.
- Now it’s time to move on to make the Ferris wheels cars. Using a jumbo popsicle stick, cut it into three pieces. Glue these pieces together after lining them up. You will need two for each car, as one will be the base and the roof.
- You need additional jumbo popsicle sticks to make the two sides, the back, and two pieces for the front. Next, you will cut regular popsicle sticks in half and glue them into the corner of each car. From the top of the car, you need to glue two pieces of the regular popsicles into the middle, this is how the car will be seated on the Ferris wheel.
- You will need to make eight Ferris wheel cars in total. Once you have completed the Ferris wheel, you can decorate it with paints and pictures.

Photo by Pixabay
Sand Menorah and Candles
During Hannukuh time, are you looking for an activity to stay in the spirit of the season? Make your own sand menorah and candles.
Materials
- One large glass jar
- 8 Small glass jars
- Scissors
- Colored sand
- Yellow grosgrain ribbon
- 9 Silver straws
Instructions for Making Sand Art
Use a funnel to pour the colored sand into the eight small jars and one large one, one color at a time. You can choose how much of each color you want to use and how you would like the colors layered.
If you want a slanted layer, tilt the jar as you pour in the sand. For a flat layer, ensure that you tap the jar after you have poured in the sand.
Instructions to make the candles
Take the silver straws. You need about nine, and trim them to the height you desire. You can then cut the yellow grosgrain ribbon into 3-inch-long pieces for each silver straw. Make a knot in each ribbon, push the straw into it, and trim the ends.
Marshmallow Dreidels
These treats can be made to enjoy after you have finished making your Menorah and looking for a rewarding snack.
Ingredients
- Jumbo marshmallows
- Stick pretzels
- Nutella Hazelnut Spread
- Chocolate Candy Kisses
- Cake Decorating Gel
Instructions
Take the pretzels and put them into the flat side of the marshmallows. Use the Nutella spread as glue to attach the candy kiss at the top of the marshmallow.
Use blue cake decorating gel and pipe one of the four Hebrew dreidel letters onto the surface of the marshmallows and allow them to dry before eating.
Conclusion
If you are looking for creative activities that you can use when spending time with family and friends then the above-mentioned activities can bring the whole family together during the holiday season.
Sources
- https://living.geico.com/saving/life-hacks/holiday-crafts/
- lubhubuk.co.uk/crafting-fun-for-the-whole-family-7-creative-ideas-and-projects/
- https://www.parents.com/holiday/hanukkah/crafts/festive-and-fun-hanukkah-crafts-and-recipes/

